该笔记的内容主要来自本人在学习渡一课程的配套资料和个人总结而成
懒加载
IntersectionObserver
IntersectionObserver 是一个现代浏览器 API,用于检测一个元素(或其子元素)相对于视口或某个祖先元素的可见性变化。
基本用法
1
| const ob = new IntersectionObserver(callback, options);
|
callback: 当被观察元素的可见性变化时调用的回调函数,callback 一开始会触发一次,确认当前的可视状态(无论当前是可见还是不可见),之后在每次可视状态发生改变时会触发。回调函数里面有两个参数:
entries: 一个数组,包含所有被观察元素的 IntersectionObserverEntry 对象,每个对象包含以下属性:
boundingClientRect: 被观察元素的矩形区域信息。intersectionRatio: 被观察元素的可见部分与整个元素的比例。intersectionRect: 可见部分的矩形区域信息。isIntersecting: 布尔值,表示元素是否与根元素相交。rootBounds: 根元素的矩形区域信息。target: 被观察的目标元素。time: 触发回调的时间戳。
observer: IntersectionObserver 实例本身。
options: 配置对象,用于定制观察行为
root:指定用作视口的元素,默认值为 null,表示使用浏览器视口作为根元素。
rootMargin: 类似于 CSS 的 margin 属性,**定义根元素的外边距,用于扩展或缩小根元素的判定区域。**可以用像素或百分比表示,例如 ‘10px’ 或 ‘10%’。
threshold: 是一个 0~1 之间的值,表示一个触发的阈值,如果是 0,只要目标元素一碰到 root 元素,就会触发,如果是1,表示目标元素完全进入 root 元素范围,才会触发。设置观察元素进入到根元素的百分比。
有了 observer 实例对象后,要观察哪个元素,直接通过 observe 方法来进行观察即可,取消观察通过 unobserve 方法:
1
2
3
4
5
6
|
ob.observe(elementA);
ob.observe(elementB);
ob.unobserve(element);
|
示例1
1
2
3
4
5
6
7
8
9
10
11
12
13
14
15
16
17
18
19
20
21
22
23
24
25
26
27
28
29
30
31
32
33
34
35
36
37
38
39
40
41
42
43
44
45
46
47
48
49
50
51
52
| <!DOCTYPE html>
<html lang="en">
<head>
<meta charset="UTF-8" />
<meta name="viewport" content="width=device-width, initial-scale=1.0" />
<title>Document</title>
<style>
body {
height: 2000px;
margin: 0;
padding: 0;
}
.target {
width: 200px;
height: 200px;
background-color: #e81b3a;
margin: 0 auto;
margin-top: 1500px;
}
</style>
</head>
<body>
<div class="target"></div>
<script>
const target = document.querySelector(".target");
function callback(entries) {
entries.forEach((element) => {
if (element.isIntersecting) {
console.log("进入视口");
} else {
console.log("离开视口");
}
});
}
const ob = new IntersectionObserver(callback, {
root: null,
rootMargin: "0px",
threshold: 0,
});
ob.observe(target);
</script>
</body>
</html>
|
示例2
1
2
3
4
5
6
7
8
9
10
11
12
13
14
15
16
17
18
19
20
21
22
23
24
25
26
27
28
29
30
31
32
33
34
35
36
37
38
39
40
41
42
43
44
45
46
47
48
49
50
51
52
53
54
55
| <!DOCTYPE html>
<html lang="en">
<head>
<meta charset="UTF-8" />
<meta name="viewport" content="width=device-width, initial-scale=1.0" />
<title>Document</title>
<style>
.container {
width: 100%;
height: 500px;
border: 1px solid black;
overflow: scroll;
}
.target {
width: 200px;
height: 200px;
background-color: lightcoral;
margin: 0 auto;
margin-top: 1000px;
}
</style>
</head>
<body>
<div class="container">
<div class="target"></div>
</div>
<script>
const target = document.querySelector(".target");
function callback(entries) {
entries.forEach((element) => {
if (element.isIntersecting) {
console.log("进入视口");
} else {
console.log("离开视口");
}
});
}
const ob = new IntersectionObserver(callback, {
root: document.querySelector(".container"),
rootMargin: "-50px",
threshold: 0,
});
ob.observe(target);
</script>
</body>
</html>
|
懒加载
懒加载含义:当出现的时候再加载。
懒加载核心原理:img 元素在 src 属性有值时,才会去请求对应的图片地址,那么我们可以先给图片一张默认的占位图:
再设置一个自定义属性 data-src,对应的值为真实的图片地址:
1
| <img src="占位图.png" data-src="图片真实地址">
|
之后判断当然这个 img 元素有没有进入可视区域,如果进入了,就把 data-src 的值赋给 src,让真实的图片显示出来。这就是图片懒加载的基本原理。
不过这里对于判断 img 元素有没有进入可视区域,有着新旧两套方案。
旧方案
早期的方案是监听页面的滚动:
1
| window.addEventListener("scroll", ()=>{})
|
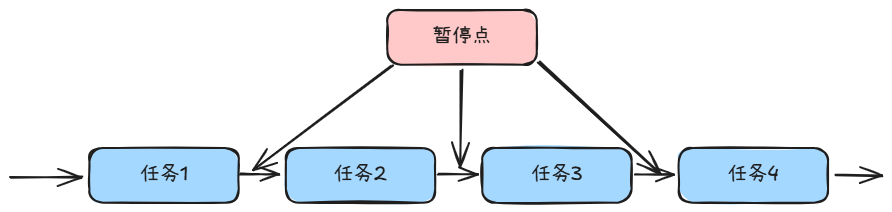
当 img 标签的顶部到可视区域顶部的距离,小于可视区域高度的时候,我们就认为图片进入了可视区域,画张图表示:

示例代码:
1
2
3
4
5
6
7
8
9
10
11
| window.addEventListener("scroll", () => {
const img = document.querySelectorAll("img");
img.forEach((img) => {
const rect = img.getBoundingClientRect();
if (rect.top < document.body.clientHeight) {
img.src = img.dataset.src;
}
});
});
|
缺点:
- scroll 事件频繁触发
- 需要手动计算目标元素是否进入可是区域
新方案
使用 IntersectionObserver 来实现。
1
2
3
4
5
6
7
8
9
10
11
12
13
14
15
16
17
18
19
20
21
22
23
24
| let observer = new IntersectionObserver(
(entries, observer) => {
for (const entrie of entries) {
if (entrie.isIntersecting) {
const img = entrie.target;
img.src = img.dataset.src;
observer.unobserve(img);
}
}
},
{
root: null,
rootMargin: "0px 0px 0px 0px",
threshold: 0.5,
}
);
const imgs = document.querySelectorAll("img");
imgs.forEach((img) => {
observer.observe(img);
});
|
与旧方案相比性能更高,只有在目标元素和根元素发生交叉的时候才会触发回调。
结合两种方案
1
2
3
4
5
6
7
8
9
10
11
12
13
14
15
16
17
18
19
20
21
22
23
24
25
26
27
28
29
30
31
32
33
34
35
36
37
38
39
40
41
42
43
44
45
46
47
48
49
50
51
52
53
54
55
56
57
|
document.addEventListener("DOMContentLoaded", () => {
const lazyImages = Array.from(document.querySelectorAll("img[data-src]"));
if (!lazyImages.length) return;
if ("IntersectionObserver" in window) {
const observer = new IntersectionObserver(
(entries, observer) => {
entries.forEach((entry) => {
if (entry.isIntersecting) {
const img = entry.target;
img.src = img.dataset.src;
img.onload = () => img.removeAttribute("data-src");
observer.unobserve(img);
}
});
},
{
rootMargin: "0px 0px 100px 0px",
}
);
lazyImages.forEach((img) => observer.observe(img));
}
else {
let active = false;
const lazyLoad = () => {
if (active) return;
active = true;
setTimeout(() => {
lazyImages.forEach((img) => {
const rect = img.getBoundingClientRect();
if (rect.top <= window.innerHeight + 100) {
img.src = img.dataset.src;
img.onload = () => img.removeAttribute("data-src");
let index = lazyImages.indexOf(img);
if (index !== -1) {
lazyImages.splice(index, 1);
}
}
});
active = false;
}, 200);
};
lazyLoad();
window.addEventListener("scroll", lazyLoad);
window.addEventListener("resize", lazyLoad);
}
});
|
在线演示
Vue相关库
在 Vue 中 vue3-observe-visibility 库对 IntersectionObserver API进行了进一步封装实现的
安装:
1
| npm install --save vue3-observe-visibility
|
注册
1
2
3
4
5
6
7
8
9
10
11
| import { createApp } from 'vue';
import App from './App.vue';
import { ObserveVisibility } from 'vue3-observe-visibility';
const app = createApp(App);
app.directive('observe-visibility', ObserveVisibility);
app.mount('#app');
|
使用示例
1
2
3
4
5
6
7
8
9
10
11
12
13
14
15
16
17
18
19
20
21
22
23
24
25
26
27
28
29
30
31
32
33
| <template>
<div>
<h1>示例</h1>
<!-- 该元素进入或者离开视口时,会触发回调函数 -->
<div
v-observe-visibility="{
callback: visibilityChange,
intersection: {
root: null,
rootMargin: '0px',
threshold: 0,
}, // 配置对象
}"
class="target"
></div>
</div>
</template>
<script setup>
function visibilityChange(isVisiable) {
console.log(isVisiable ? "进入视口" : "离开视口");
}
</script>
<style scoped>
.target {
height: 200px;
width: 200px;
background-color: pink;
margin: 0 auto;
margin-top: 1000px;
}
</style>
|
实战演练
main.js1
2
3
4
5
6
7
8
9
10
| import { createApp } from 'vue'
import App from './App.vue'
import { ObserveVisibility } from 'vue3-observe-visibility'
const app = createApp(App)
app.directive('observe-visibility', ObserveVisibility)
app.mount('#app')
|
App.vue1
2
3
4
5
6
7
8
9
10
11
12
13
14
15
16
17
18
19
20
21
22
23
24
25
26
27
28
29
30
31
32
33
34
35
36
37
38
39
40
41
42
43
44
45
46
47
48
49
50
51
52
53
54
55
56
57
58
59
60
61
62
63
64
65
66
67
68
69
70
71
72
73
| <template>
<div>
<h1>图片懒加载示例</h1>
<div class="image-grid">
<!-- 一定要配置 once 配置项 -->
<!-- 否则会在可视状态发生变化时反复加载 -->
<img
v-observe-visibility="{
callback: visibilityChanged,
once: true, // 相当于加载一次之后调用 unobserve
intersection: {
root: null,
rootMargin: '0px',
threshold: 0.1
}
}"
v-for="(url, index) in imageUrls"
:key="index"
:data-src="url"
:alt="'id ' + (index + 1)"
:src="loadingImage"
@error="handleError"
/>
</div>
</div>
</template>
<script setup>
import { ref } from 'vue'
// 生成一些图片URL
const imageUrls = ref([])
// 往 imageUrls 中添加 50 个图片 URL
for (let i = 1; i <= 50; i++) {
imageUrls.value.push(`https://picsum.photos/id/${i}/600/400`)
}
// 加载图片的 url
const loadingImage = 'https://dummyimage.com/600x400/cccccc/000000&text=Loading'
// 错误图片的 url
const errorImage = 'https://dummyimage.com/600x400/ff0000/ffffff&text=Error'
function visibilityChanged(visibility, entry) {
const img = entry.target
if (visibility) {
img.src = img.dataset.src
}
}
// 图片加载失败时的处理函数
function handleError(event) {
const img = event.target
img.src = errorImage
}
</script>
<style scoped>
.image-grid {
display: flex;
flex-wrap: wrap;
width: 800px;
margin: 0 auto;
}
.image-grid img {
display: block;
margin: 10px;
width: 200px;
height: 150px;
object-fit: cover;
}
</style>
|